b. Attach an EBS Volume to a running Instance
-
On the Left Navigation Bar click on Volumes under Elastic Block Store to view all the volumes. Select your newly created volume searching the list for the unique Name tag provided in the previous step.
-
Click on Actions and further click on Attach Volume
-
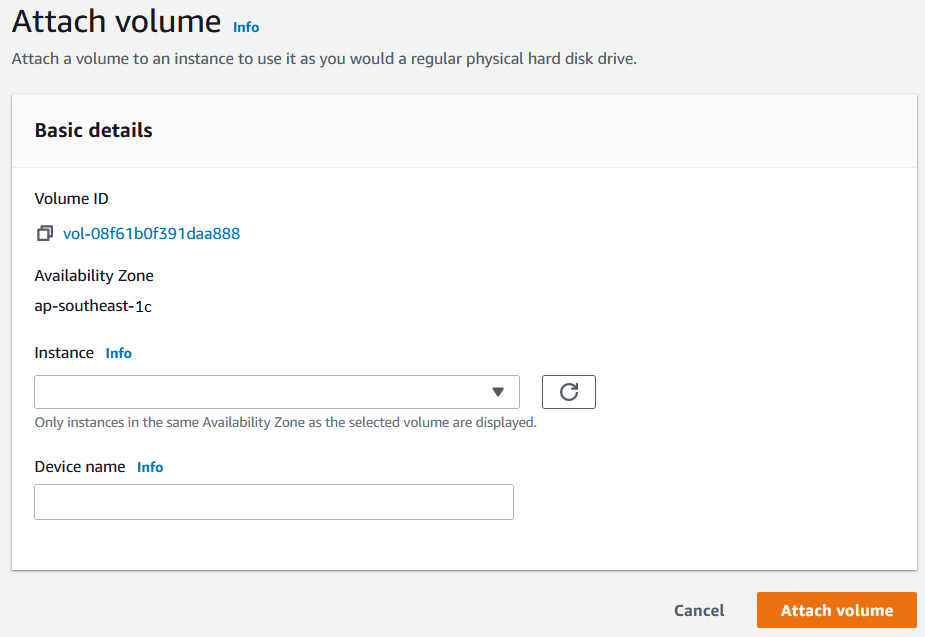
In the Attach Volume dialog, click on the Instance field and select the EC2 instance by looking for the Instance ID or Name Tag in the list. Click Attach to attach the volume.
If attached successfully - In the list of displayed volumes you should see your new volume having a status (under the State Column) indicating In Use.
-
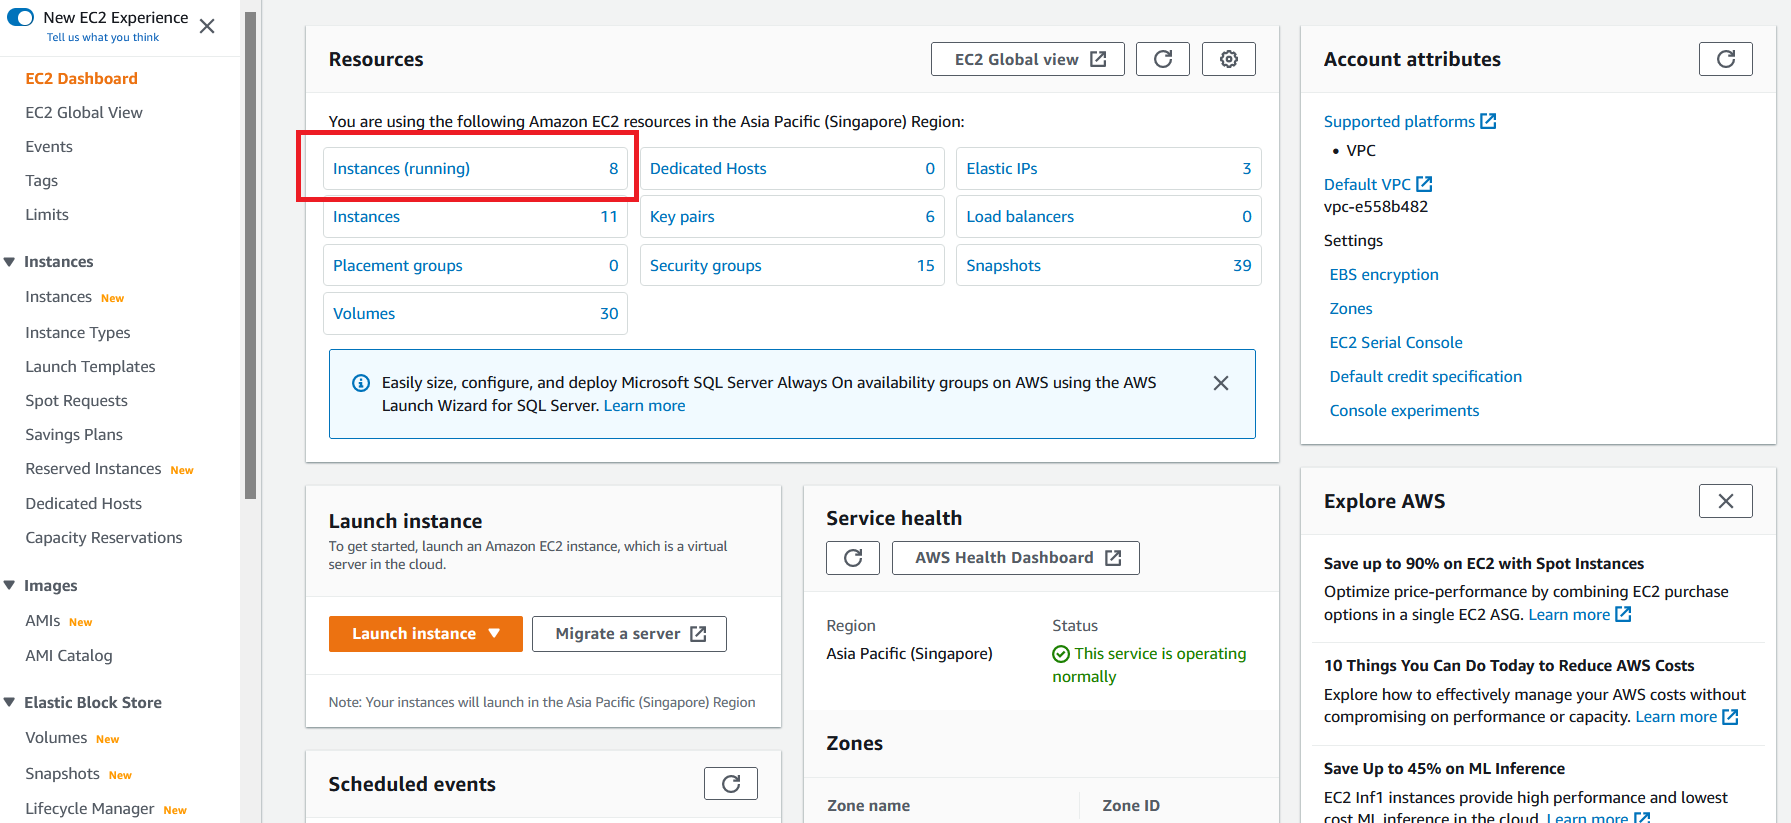
On the left Navigation pane click EC2 Dashboard on the very top of the list of items.
-
Select Instances (running) and then select your EC2 Instance from the list of instances to which you attached the Volume.
- In the EC2 Details section select Storage to see the Block devices attached to the instance. Notice the new volume just created attached as an additional Block Device with a Volume ID, Device Name and Volume Size.
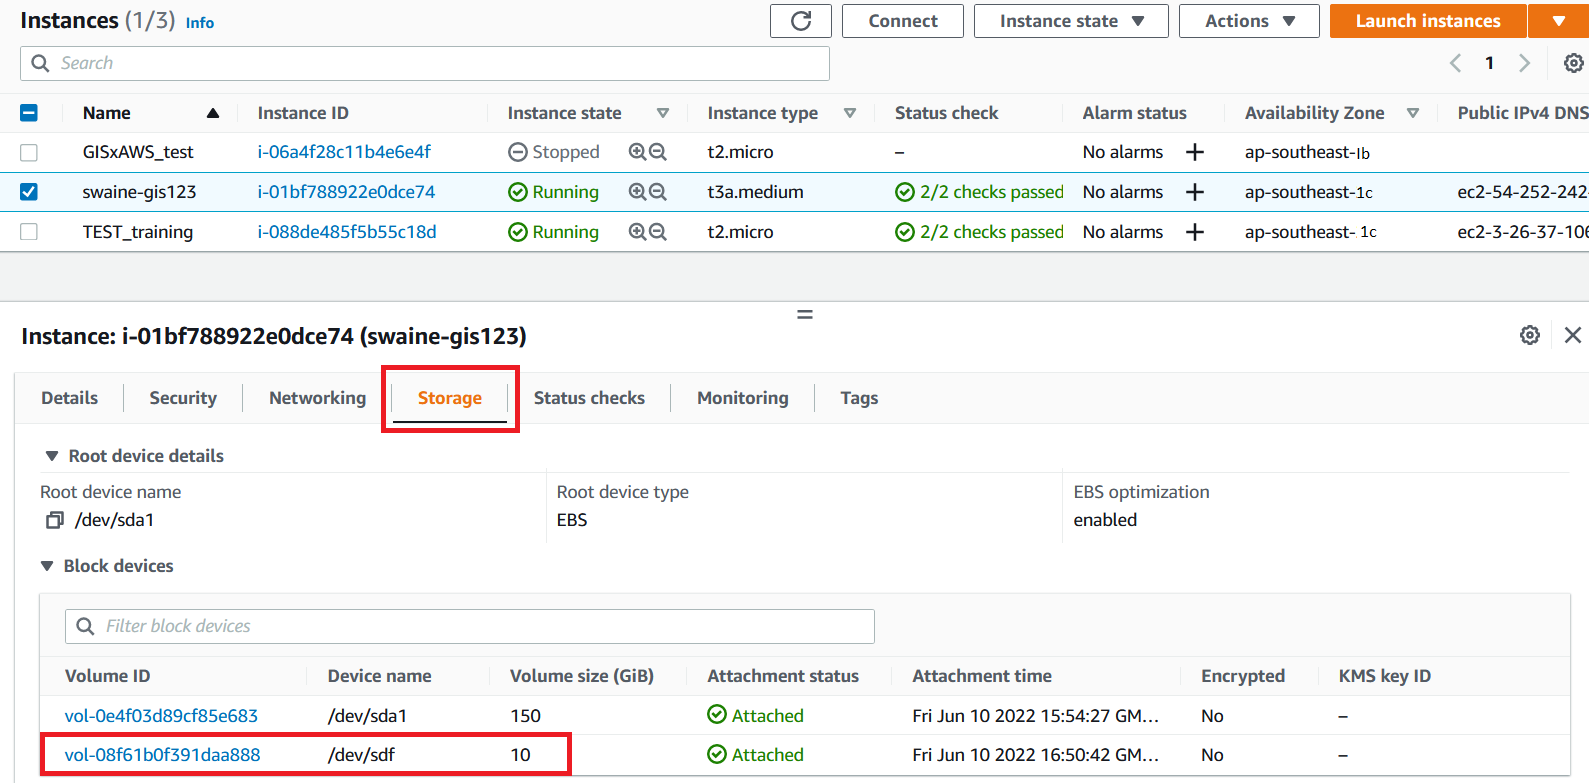
Important: Note down the specific device name for the next step of mounting the volume. The drive name may differ from what’s shown.
NOTE: Depending on the Linux version and the machine type, the device names may differ. The EC2 Console will generally show /dev/sdX, where X is a lower-case letter, but you may see /dev/xvdX or /dev/nvmeYn1. The following table may help with translating. Another way to help track is to pick different sizes for your EBS volumes (such as 151, 152, 153 GB for different volumes). | Device name (Console) | Alternate 1 | Alternate 2 | | — | — | — | | /dev/sda | /dev/xvda | /dev/nvme0n1 | | /dev/sdb | /dev/xvdb | /dev/nvme1n1 | | /dev/sdc | /dev/xvdc | /dev/nvme2n1 | | /dev/sdd | /dev/xvdd | /dev/nvme3n1 | | /dev/sde | /dev/xvde | /dev/nvme4n1 | | /dev/sdf | /dev/xvdf | /dev/nvme5n1 |