b. Create EC2 Image
We will now create an image of the EC2 instance.
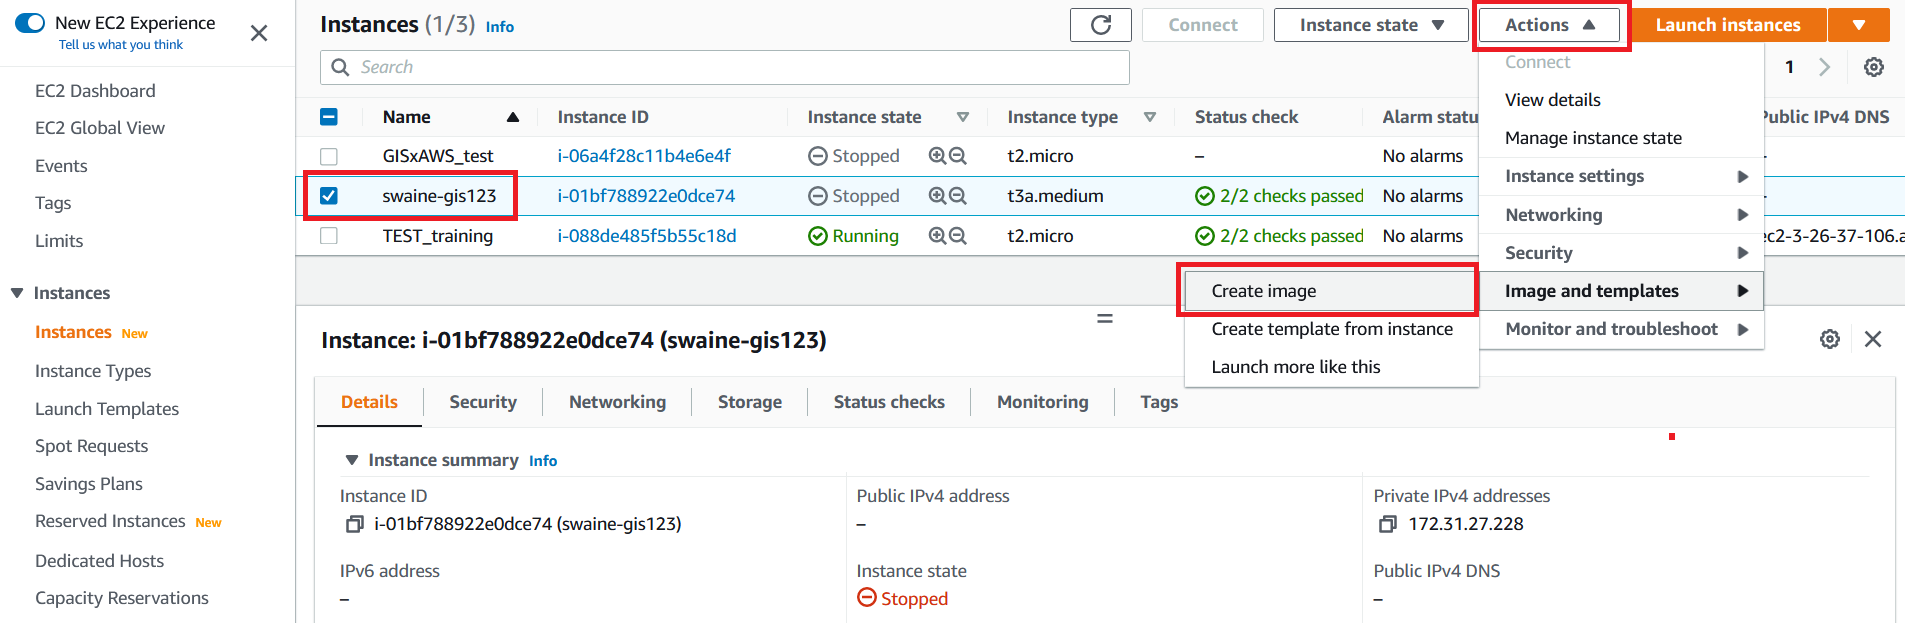
- Select the EC2 instance we stopped, click on the Actions button, click on Image, and click Create Image.
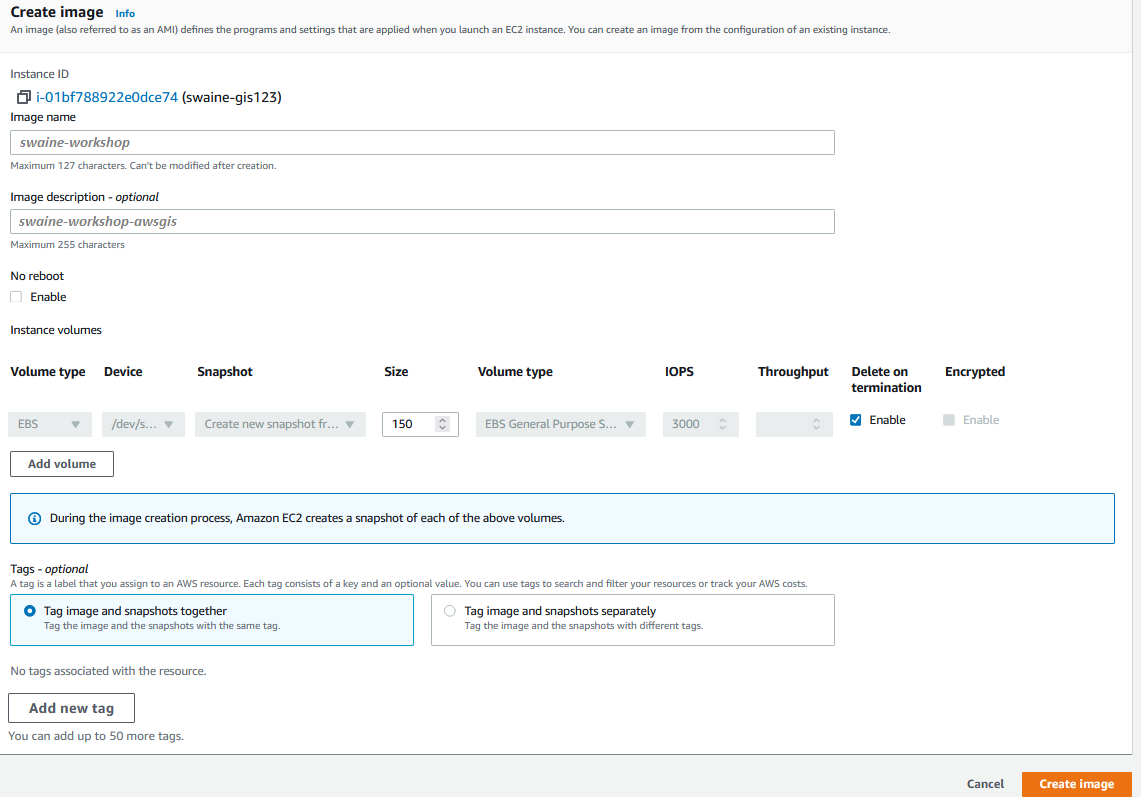
- On the Create Image page, provide an Image Name and Image description. Ensure you remove the extra EBS volume we had attached to the EC2 instance by clicking on the “x” button (see image below) . Click on Create Image to start the Image creation task.
An image creation task is started in the backgroud and you will see a message stating “Successfully created …” on the top of the EC2 Dashboard page when it’s ready to go.
NOTE: In case you had not stopped the instance and were still logged in, the instance would have rebooted and your ssh session would have ended. You will need to connect again (verify the IP address).

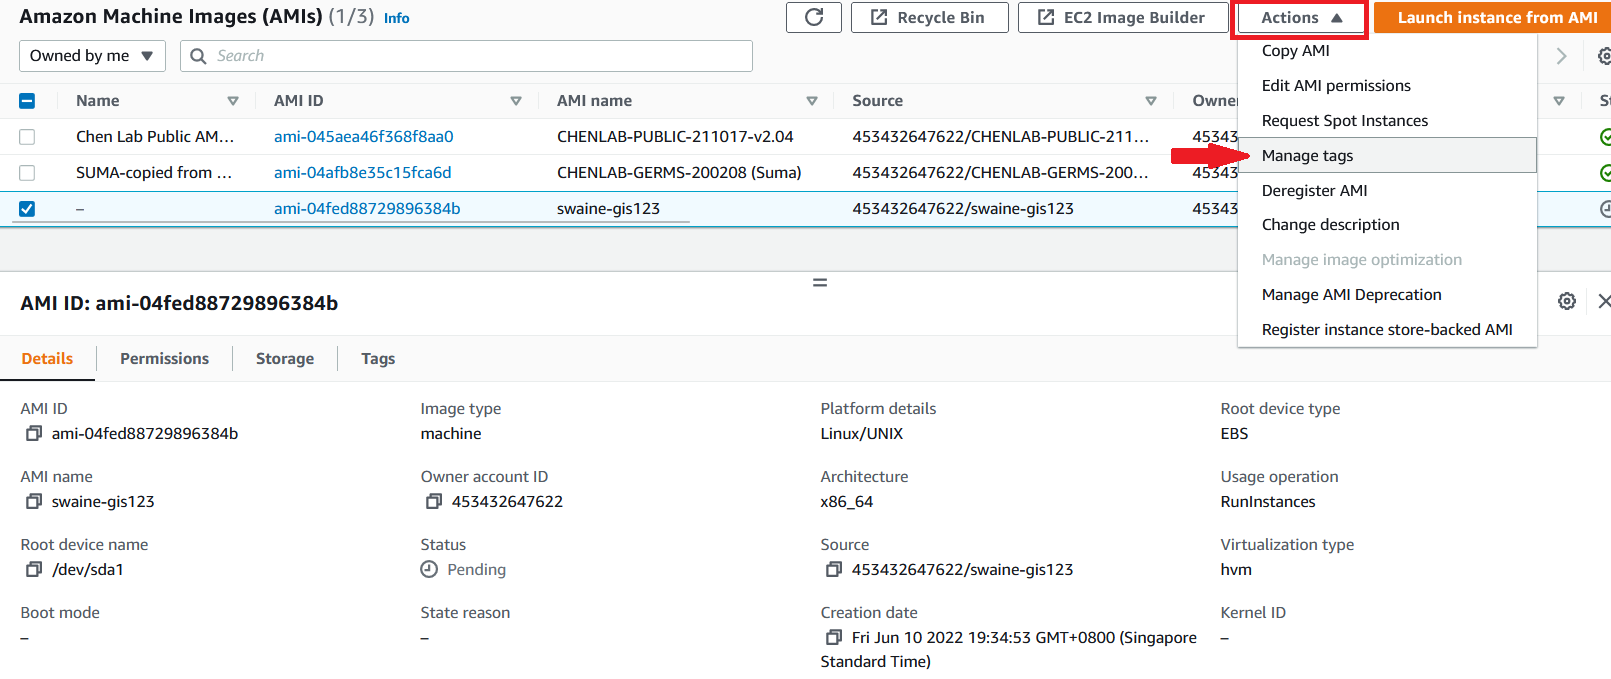
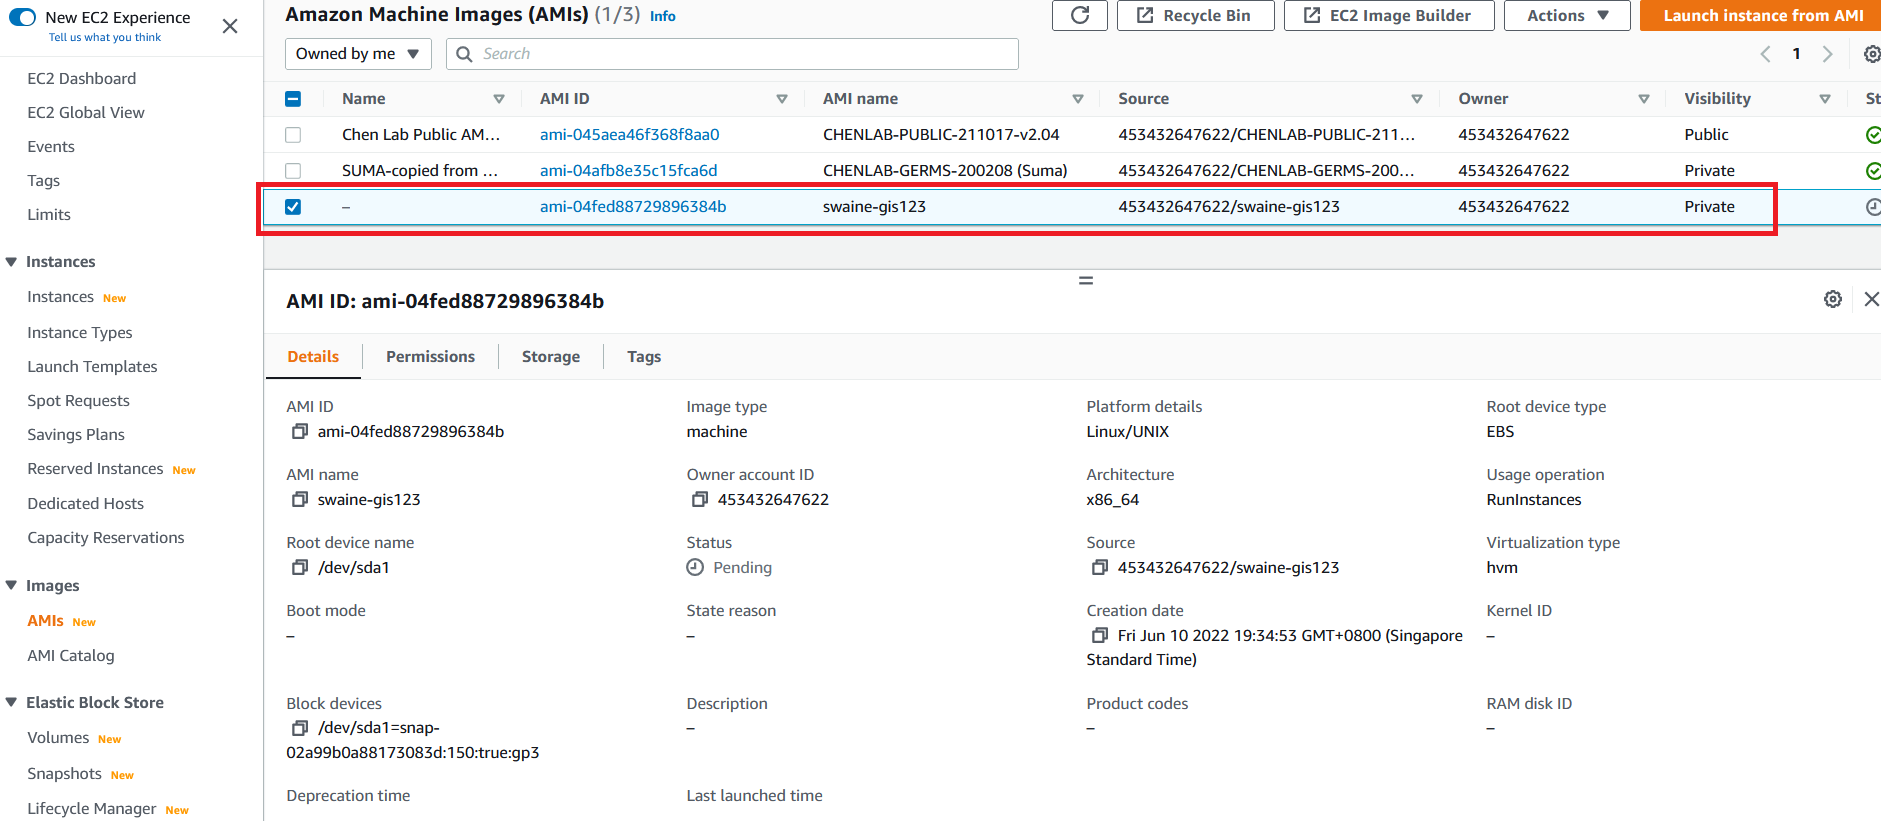
- Pause for a minute to let the Image creation task progress. To check if the image has been created click on AMIs under the Images section in the left Navigation pane to view all the AMI’s created earlier as well as the new one in progress.
You will see that the new AMI is either being created or already created and ready for use with the name you’ve given.
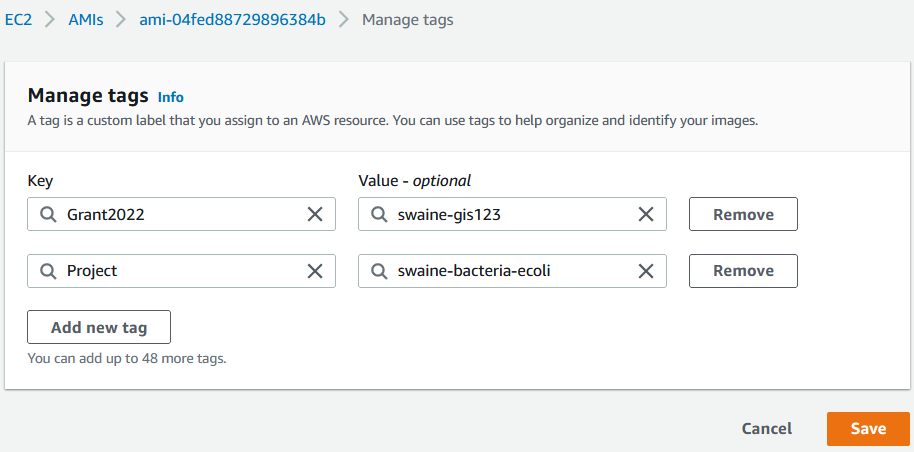
- Select your new AMI instance, click on the Actions button, then Manage Tags. Make sure to tag your image with a Name, User, and Grant tag, as before. For this instance, you can use the Name value “[your-initials]-AMI”.